
In my effort to improve the front end aerodynamics of my 987.2 Cayman S, I often look to the Porsche GT cars for inspiration. Aerodynamics are a very complicated subject and really, you need CFD and real world testing to have good outcomes. Porsche spends a lot of engineering effort optimizing those cars, so following their lead should end in pretty decent results.
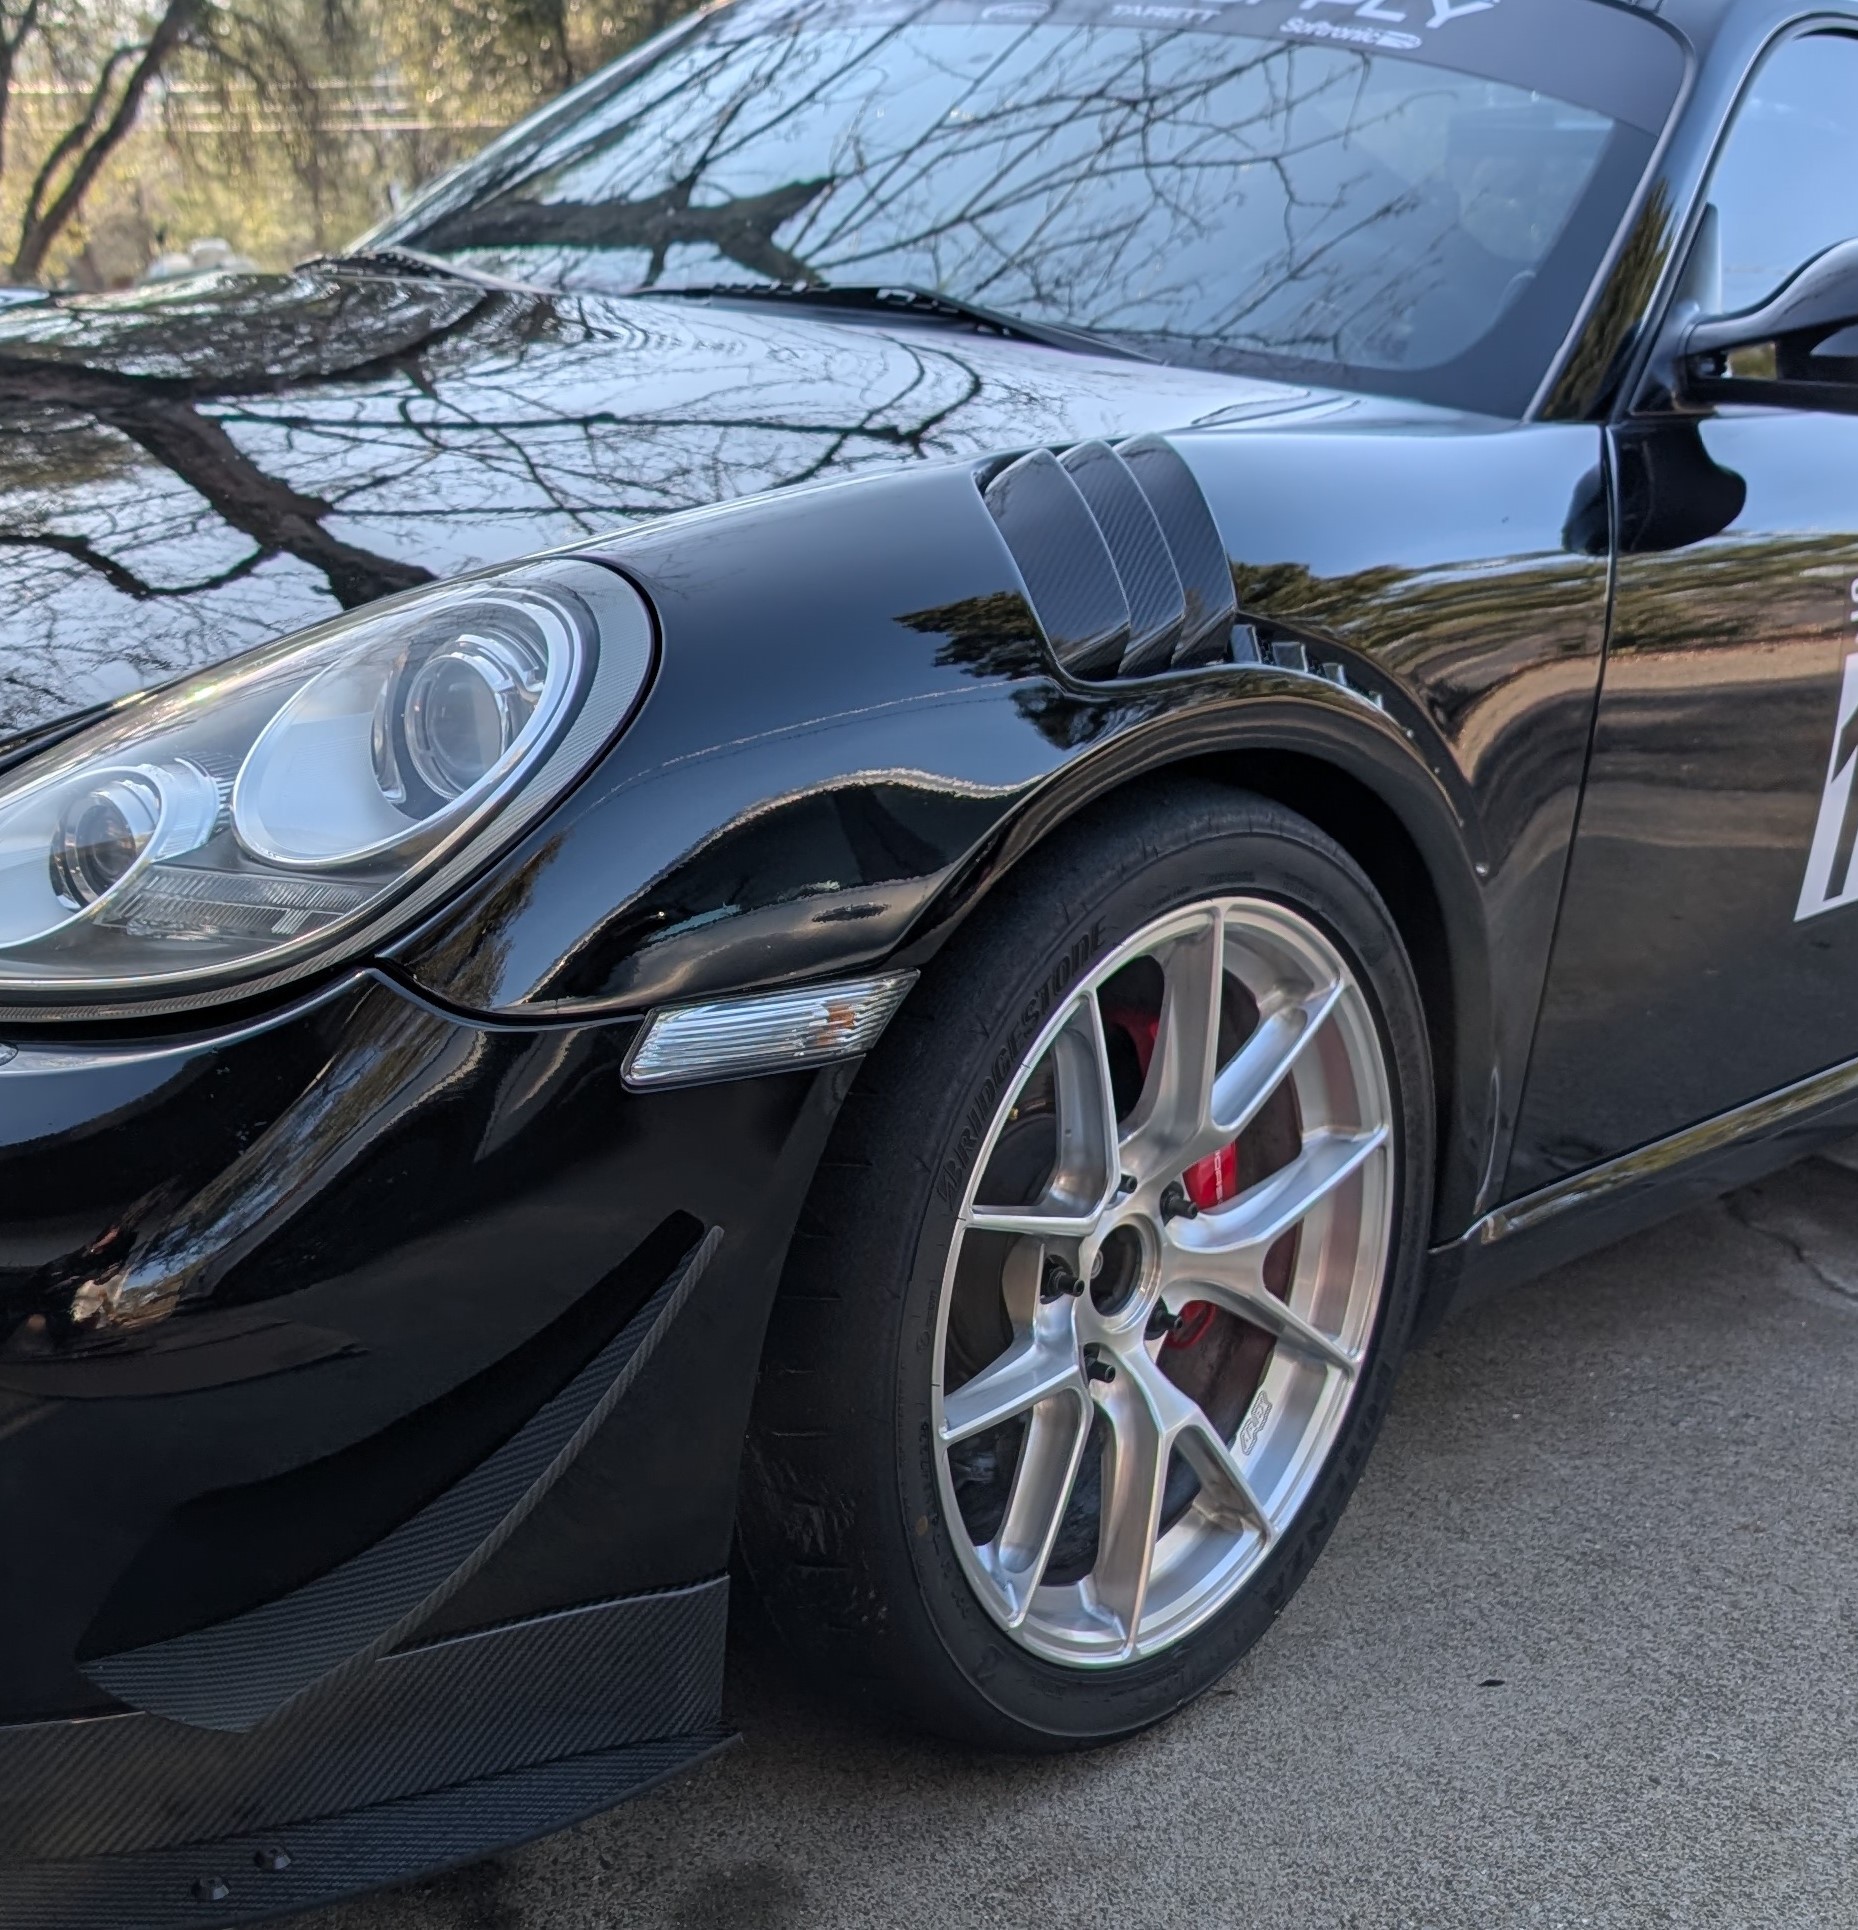
Getting some vented fenders on my car has always been on the list, and finally I had the opportunity to get it done. They should combine well with the other front-end aero changes I made, including a flat bottom splitter, and routing all of the side-radiator air into the wheel wells (see previous blog posts for details.). The idea is that they help evacuate the high pressure and turbulent air inside the wheel wells, reducing lift and cleaning up airflow under the car.
Plus, they look pretty cool to boot.
While at SEMA, I met a contact with a company that makes aftermarket body parts. I went through their catalog and found the GT3 or GT2 RS inspired vented fenders that eventually made their way onto my 987.2.
These fenders are now for sale through my website, and while not perfect, I think the end results are pretty good for the money. I only sell parts that I have either personally tested and found to be good quality (and ideally good value), or are from brands that I have experience with and trust their products. This blog post intends to give you a clear picture of what to expect if you purchase these fenders.
Overall thoughts
The fenders are made from fiberglass (FRP) and I opted for a 3K twill weave carbon fiber for the vents. The fit and finish of the fender as a whole is pretty impressive for the money. The body lines are right, and as a whole the details are pretty good. Far better than some fiberglass parts I’ve purchased from some well-known companies that make them in the US.
You can expect to do the typical body work on this fiberglass fender, like stripping back the gel coat, sanding everything smooth, filling pin holes, etc. I personally opted to trim the fender lip to ensure I could fit wide tires inside it. A few holes need to be drilled, widened, or trimmed to fit body clips or bolts. They include threaded inserts for many of the OEM mounting points which is a nice (unexpected, honestly) touch.
Expect to spend some time fitting up the gas door mount, too, I had to widen the holes, shave off some material, and built some areas back up with epoxy to get everything aligned (pictures below). Not too bad, just a little finicky.
The one hesitation I had with recommending these fenders to anyone else, is what is in my opinion, a mistake in how they mount the headlight bracket to the fender. It is fixable, but it does cause some extra work for anyone attempting to install these. Without fixing it, the fender is too thick near the point where it contacts the front bumper, and the other body parts don’t line up.
The solution (shown below) is pretty straight-forward, luckily. I was worried when I started removing material, but my hypothesis on the fitment issue was correct and that means you have a relatively simple process to follow to fix yours, if you opt to install these yourself. Be sure to read this full post so you know what you’re getting into!
Installation
Well let’s start with delivery. You’ll get a nicely packaged box inside a wooden crate, delivery will get scheduled via a phone call after it finally makes it out of the port and through customs.

Unboxing went well, fenders are well protected and undamaged, looking promising!

Let’s do some test fitting.


Looking pretty dang good, but oh yeah, here’s that issue I mentioned earlier.


That ain’t right. The issue, and fix, are shown below. Essentially, they attached the headlight bracket to the fender mount, rather than laying it inside the fender. That needs to be completely ground flush, and then the headlight bracket reattached. I used epoxy (JB Weld) to do so.


Be careful when you do this. You can see I got a little aggressive with the flap disc and I had to build the mounting holes back up with more epoxy. I did have to remove enough material that the headlight bracket was completely separated from this part of the fender.


Apparently these are the only photos I took of me reattaching that headlight bracket. I highly recommend mounting the plastic headlight mount/bracket and the headlight itself into the fender prior to epoxying this together. I needed to shim my plastic headlight bracket using some washers to get the headlight aligned nicely with the fender. Leaving the headlight in place while you do the epoxy should help hold everything where you want it.

Alright let’s see how we’re looking after that fix… and yeah pretty solid. It certainly isn’t a bolt-on affair, but it does now fit pretty well. You’ll see I also opted to install some AeroCatch hood pins while I was at it. I did this for a few reasons; it makes the hood height more easily adjustable, it means I can easily get into the hood to access the battery if I have an issue (mine is lithium), and again, it looks pretty cool.

Certainly not for the feint of heart though.

I unfortunately don’t have a good photo of this, but you will also need to spend some time test fitting the gas door and mount. Make sure it secures solidly and sits centered and flush. I had to remove some material, build it back up with epoxy, and get the holes just right so it fit the mount tight and secured the bracket.
Once you’re happy with how the fenders fit on the body of the car, it’s time for paint. I’ve got a couple progress photos of that to share. I also opted to paint over some of the carbon similar to how they look from the factory.


Finally, after a lot of hard work, it’s finally paying off. Take your time fitting them, shimming or tweaking where needed to get the body lines right. Remember you will have to trim the fender liners. Below are some photos of how I did it, but there may be a better way. Mine were already cut from rolled stock fenders.
If you’re still running AC (like I am) you’ll want to do something to help protect and over up the AC lines, especially on the passenger side. I used some gaffer tape plus mesh cable covers I found on Amazon. These make them hard to see through the vents and should help a bit with protection too.


I also decided to change how the vent mesh was installed, and swap it out for nicer mesh. They come with the mesh installed into each of the 3 outlets but I popped those tabs off and mounted a single piece flush under the vent.
The mesh I used is Perforated Hex Aluminum Grill Mesh from Custom Car Grills (no affiliation). To attach it, I used some cable clips I found online, part number VCC-63254. I ordered mine from Newark.

And finally, the end result. Not a small amount of effort, but body work tends to be that way. I’m definitely happy with how they turned out and ultimately decided to help offer them to folks. Please feel free to reach out to me (or comment on this post) if you have any questions.


4 responses to “GT3 RS Style Vented Fenders for 987.2 Cayman”
Is there any possibility of something like this being made available for the 987.1?
Hey Lawrence! The company that makes these doesn’t have one for the 987.1, however, I have been in contact with a company that does. If you’d be interested in having me help you import a set at a low cost so you can test them out and provide feedback, that’s something I can help with. Reach out to me via email or my contact page on my website.
I’m thinking about converting my 987.1 front end to 987.2 so that I can run the Verus front splitter, and it seems like I would have to replace the bumper and the fenders with the 987.2 to do it right. I’m thinking maybe this would be the route to go for the fenders… or I might just order the 987.2 front splitter and see if I can modify for the 987.1…. thoughts on either or both?
Hey Matthew, I am sure that conversion is possible but it will affect a lot of parts. Aside from just the bumper and fender, the headlights are different too, along with all the radiator ducting, trim, etc. I am not sure if the radiators are oriented differently or the 987.2 will fit right on. They are different parts as the hoses are different, I do know that.
Have you looked at the Joe Toth flat bottom 987.1 splitter? Not as fancy as Verus, but would be a direct fit.